The Upper Trapezius Muscle
Dear Friends! I hope life is delivering all the resources you need to feel safe and at home in your body today! If not, no need to worry because… I have a resource for you right hear — sent from my heart to yours!
Self-myofascial release techniques are an amazing way to stop, slow down, and connect to the wisdom of the body. Today I want to share a practice to address pain/tension in the region of the neck… specifically targeting the upper trapezius muscle attachment.
When we have connective tissue adhesions in the neck region (the upper trapezius being one muscle that is in this particular part of the body) this puts pressure on pain sensitive nerves and vwala = you experience pain sensation as the nerve signals send this information to the brain.
Therefore, we want to break up, soften, loosen the adhesions in the connective tissue and take the pressure off those pain sensitive nerves.
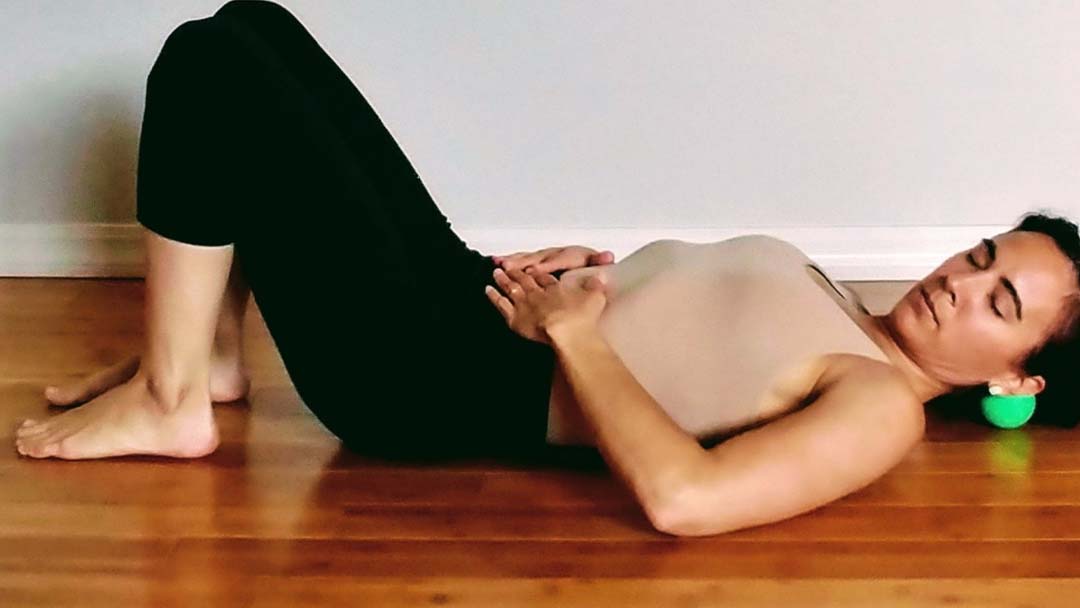
The image that goes along with this post gives you a good visual of positioning, but I am going to walk you through it too… here goes!
What you need: Timer + Tennis ball (or the same sized medicine ball)
*Set your timer for 5 1/2 minutes
*Lie on your back. Your legs can be in any comfortable position that works for you.
*Place a tennis/medicine ball at the base of your skull to the right side of the spine, but not directly on the spine.
*Turn your head approximately 45 degrees to the right and let the weight of your head sink into the medicine/tennis ball.
*Close your eyes and make micro movements with your head until you find a spot that is tender and that you sense is where the tightness is in the connective tissue.
*Breath deeply. I like to place my hands on my belly and make sure I am using my diaphragm to breath by filling the belly on the inhale and relaxing it on the exhale.
*If the area that was tender starts to soften and your head wants to move slightly to follow that release, trust that! Move toward the next area of tension and then waite there. You may have this process of — softening, moving, waiting, softening, moving, waiting — several times, or you may only have it happen once… either are fine! The important part is that you follow the body when it let’s go.
*Another thing to note is that sometimes when we have a release in the fascia (connective tissue) emotions will want to release too, if this occurs — allow it if you feel safe to do so (eg: cry, sigh, moan, laugh, etc.).
*As well, sometimes the body will intuitively want to move after a release (eg: shake, writhe, or simply stretch/contract, etc) give your body some integration time and space to do this as well if it happens organically. However, there is no need to “make it” happen if it doesn’t; stillness is great too!
*Once your timer goes off for the first side, take a moment before moving forward. Then repeat the same steps on the left side of the spine just below the skull.
Once you have spent five minutes on each side — give yourself a minute or two to rest on your back or side and simply notice how you feel.
Take some deep breaths and scan the body to take note of any pain/sensation in any other part of your body. If you notice something, make a mental note — as this is an indicator that those other parts will need some attention next time you practice… so, stay tuned here for instruction on releasing other parts of the body!…
…And, as always: feel free to email, facebook message, or private message me on instagram with any questions you might have or how this practice went for you. I would love to hear your thoughts/experiences as well as what other parts of the body you would like some instruction on for self-myofascial release practices!
In Radiance + A Lotta Love,
Jahara Sara Seitz, OTR/L, E-RYT